DEPRECATED
Updated Instructions Here
Let’s Encrypt provides a free, automated, and open Certificate Authority. It’s useful for providing basic SSL certificates for your web services. Although one of the quirks of their setup is they only provide 90 day certificates. That means you need to renew and deploy new certificates within every 90 days if you wish maintain certify and functionality. For single server deployments, it’s pretty trivial to setup an automated process to renew and update your certificates. On GitLab Pages, where you don’t have access to the container your web pages are running, things are further complicated.
I’ve taken to scripting the manual renewal process while waiting for GitLabs to add support. Unfortunately, while I can automate the certificate renewal process, it is currently not possible to automate the certificate deployment process.
So let’s walk through the steps.
In my previous post, Using Let’s Encrypt with Gitlab Pages, I walked through the steps to integrate the Let’s Encrypt HTTP confirmation process with GitLab’s CI. The following expands upon this for renewals.
I’ve written an expect script to handle the interactive process of renewal. You can download it from here.
Configuration
There are two pieces of configuration necessary. The first is the
creation of a Certbot
.ini
file. It specifies your domains, your email address, and directories
that Certbot will use. Oddly, it seems you can not specify where the
certificates will be stored. That remains under /etc/letsencrypt/.
Example .ini file below:
text = True
domains = [comma delimited list of domains]
email = [your email address]
renew-by-default
agree-tos
rsa-key-size = 4096
logs-dir = /Users/andy/tmp/certbot/logs/
work-dir = /Users/andy/tmp/certbot/work/
Note that the logs-dir and work-dir need to be created and owned
by your user account and not root. The ssl-renew.ex script does not
run as root, but should be run as the GitLab user.
You will need to modify the ssl-renew.ex script to let it know where
various files and directories reside. The values in question are:
baseDir– The directory under which everything else lives.GLDir– The local repository of your GitLab pages.Conf– The Certbot.inifile.SaveDir– Where to save the Let’s Encrypt validation files within your repository.
Example:
set baseDir "/Users/andy/Documents/personal/gitlab"
set GLDir "${baseDir}/autonomic-guru"
set Conf "${baseDir}/blogging/ssl-renew/autonomic-guru.ini"
set SaveDir "${baseDir}/autonomic-guru/le"
Running
After the configuration is complete, all you do is run the script as a normal user:
$ ./ssl-renew.ex
The script will take a while to run. For each domain/SAN in your certificate renewal request, the script will:
- Wait for you to enter your sudo password (if necessary).
- Accept your IP address being logged by Let’s Encrypt.
- Read the expected values for the validation file and its content.
- Write the file into the repository directory.
- Add, commit, and push that file up to master.
- Wait until the file appears on your Pages (this could be several minutes).
- “Hit Return” to let Certbot know it can check for the validation file.
- Repeat stpes 2–6 for each SAN.
The output is a combination of what is coming from Certbot, Git, and,
ssl-renew.ex. The following is an example output from my last
renewal.
spawn certbot certonly --config /Users/andy/Documents/personal/gitlab/blogging/ssl-renew/autonomic-guru.ini -a manual --debug
Saving debug log to /Users/andy/tmp/certbot/logs/letsencrypt.log
Starting new HTTPS connection (1): acme-v01.api.letsencrypt.org
Obtaining a new certificate
Performing the following challenges:
http-01 challenge for autonomic.guru
http-01 challenge for www.autonomic.guru
-------------------------------------------------------------------------------
NOTE: The IP of this machine will be publicly logged as having requested this
certificate. If you're running certbot in manual mode on a machine that is not
your server, please ensure you're okay with that.
Are you OK with your IP being logged?
-------------------------------------------------------------------------------
(Y)es/(N)o: y
Make sure your web server displays the following content at
http://autonomic.guru/.well-known/acme-challenge/2Nm9SA45tBSM93TBSqwd7maLZOEJmVEK0DdUknC13iM before continuing:
2Nm9SA45tBSM93TBSqwd7maLZOEJmVEK0DdUknC13iM.wyMCCkUN6yUmKBQ7NEJJNtLnXmaTmlbRoIL2TNcIj-s
If you don't have HTTP server configured, you can run the following
command on the target server (as root):
mkdir -p /tmp/certbot/public_html/.well-known/acme-challenge
cd /tmp/certbot/public_html
printf "%s" 2Nm9SA45tBSM93TBSqwd7maLZOEJmVEK0DdUknC13iM.wyMCCkUN6yUmKBQ7NEJJNtLnXmaTmlbRoIL2TNcIj-s > .well-known/acme-challenge/2Nm9SA45tBSM93TBSqwd7maLZOEJmVEK0DdUknC13iM
# run only once per server:
$(command -v python2 || command -v python2.7 || command -v python2.6) -c \
"import BaseHTTPServer, SimpleHTTPServer; \
s = BaseHTTPServer.HTTPServer(('', 80), SimpleHTTPServer.SimpleHTTPRequestHandler); \
s.serve_forever()"
/Users/andy/Documents/personal/gitlab/autonomic-guru/le/2Nm9SA45tBSM93TBSqwd7maLZOEJmVEK0DdUknC13iM
saveme: /Users/andy/Documents/personal/gitlab/autonomic-guru/le/2Nm9SA45tBSM93TBSqwd7maLZOEJmVEK0DdUknC13iM
[master 8f1c1c7] letsencrypt file
1 file changed, 1 insertion(+)
create mode 100644 le/2Nm9SA45tBSM93TBSqwd7maLZOEJmVEK0DdUknC13iM
Counting objects: 4, done.
Delta compression using up to 8 threads.
Compressing objects: 100% (4/4), done.
Writing objects: 100% (4/4), 458 bytes | 0 bytes/s, done.
Total 4 (delta 2), reused 0 (delta 0)
To gitlab.com:shackledtodesk/autonomic-guru.git
bba327e..8f1c1c7 master -> master
~+~+~+~+~+~+~+~+~+~+~+~...
Press ENTER to continue
Starting new HTTP connection (1): autonomic.guru
Make sure your web server displays the following content at
http://www.autonomic.guru/.well-known/acme-challenge/dZ9Q6LLpwVIGp4-qUWTUDu89GHyyWSsxjTvzakUyD78 before continuing:
dZ9Q6LLpwVIGp4-qUWTUDu89GHyyWSsxjTvzakUyD78.wyMCCkUN6yUmKBQ7NEJJNtLnXmaTmlbRoIL2TNcIj-s
If you don't have HTTP server configured, you can run the following
command on the target server (as root):
mkdir -p /tmp/certbot/public_html/.well-known/acme-challenge
cd /tmp/certbot/public_html
printf "%s" dZ9Q6LLpwVIGp4-qUWTUDu89GHyyWSsxjTvzakUyD78.wyMCCkUN6yUmKBQ7NEJJNtLnXmaTmlbRoIL2TNcIj-s > .well-known/acme-challenge/dZ9Q6LLpwVIGp4-qUWTUDu89GHyyWSsxjTvzakUyD78
# run only once per server:
$(command -v python2 || command -v python2.7 || command -v python2.6) -c \
"import BaseHTTPServer, SimpleHTTPServer; \
s = BaseHTTPServer.HTTPServer(('', 80), SimpleHTTPServer.SimpleHTTPRequestHandler); \
s.serve_forever()"
Press ENTER to continue/Users/andy/Documents/personal/gitlab/autonomic-guru/le/dZ9Q6LLpwVIGp4-qUWTUDu89GHyyWSsxjTvzakUyD78
saveme: /Users/andy/Documents/personal/gitlab/autonomic-guru/le/dZ9Q6LLpwVIGp4-qUWTUDu89GHyyWSsxjTvzakUyD78
[master 296124c] letsencrypt file
1 file changed, 1 insertion(+)
create mode 100644 le/dZ9Q6LLpwVIGp4-qUWTUDu89GHyyWSsxjTvzakUyD78
Counting objects: 4, done.
Delta compression using up to 8 threads.
Compressing objects: 100% (4/4), done.
Writing objects: 100% (4/4), 462 bytes | 0 bytes/s, done.
Total 4 (delta 2), reused 0 (delta 0)
To gitlab.com:shackledtodesk/autonomic-guru.git
8f1c1c7..296124c master -> master
~+~+~+~+~+~+~+~+~+~+~+~..
Starting new HTTP connection (1): www.autonomic.guru
Waiting for verification...
Cleaning up challenges
Generating key (4096 bits): /etc/letsencrypt/keys/0008_key-certbot.pem
Creating CSR: /etc/letsencrypt/csr/0008_csr-certbot.pem
Non-standard path(s), might not work with crontab installed by your operating system package manager
IMPORTANT NOTES:
-known/acme-challenge/dZ9Q6LLpwVIGp4-qUWTUDu89GHyyWSsxjTvzakUyD78
# run only once per server:
$(command -v python2 || command -v python2.7 || command -v python2.6) -c \
"import BaseHTTPServer, SimpleHTTPServer; \
s = BaseHTTPServer.HTTPServer(('', 80), SimpleHTTPServer.SimpleHTTPRequestHandler); \
s.serve_forever()"
Press ENTER to continue
Starting new HTTP connection (1): www.autonomic.guru
Waiting for verification...
Cleaning up challenges
Generating key (4096 bits): /etc/letsencrypt/keys/0008_key-certbot.pem
Creating CSR: /etc/letsencrypt/csr/0008_csr-certbot.pem
Non-standard path(s), might not work with crontab installed by your operating system package manager
IMPORTANT NOTES
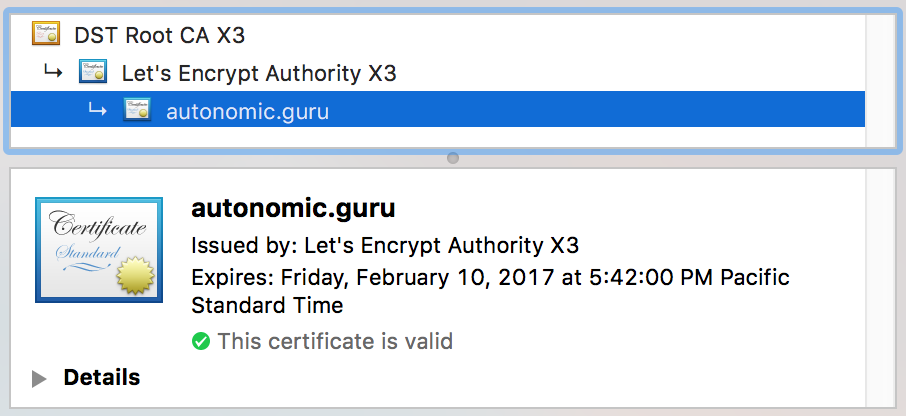
You certificates should now be generated and available at /etc/letsencrypt/live/[your domain]/
In the GitLab project UI, you will be able to see each Certbot
validation commit and subsequent CI build. Sometimes GitLab’s CI
process gets hung and the ssl-renew.ex script will wait indefinitely
for the validation file to show up. But if things are working
smoothly, it should only take a couple of minutes per SAN in the CSR
to complete.

Updating Your Certs
Now comes the manual part.
At this time there is no API call available to add/remove/update a domain in GitLab Pages. Additionally, you can’t update an existing domain to change the certificate.
The process to update is similar to the steps to add the certificates
when you first enabled SSL to your GitLab Pages. Get your certificate
and private key ready (found in /etc/letsencrypt/live/[domain]/).
Then steps are:
- Go to the Pages section of the GitLab Project Web UI.
 your domain (I hate this).
- Add your domain
 (well, new again).
 - Use the
fullchain.pemfor the Certificate text box andprivkey.pemin the Key text box. - Then click
 .
. - Should only take about a minute or two for the domain and certificate to update and you can confirm it in your browser.